

Who doesn’t love a perfectly golden, buttery, and flaky croissant? Whether you’re pairing it with your morning coffee or using it for a gourmet sandwich, croissants are a masterpiece of French baking. But here’s the thing—making them at home can seem intimidating. The good news? With a little patience and the right techniques, you can create bakery-quality croissants in your own kitchen.
In this guide, we’ll break it all down step by step. You’ll learn what makes croissants so special, the essential ingredients, and how to master the art of lamination (that’s the fancy term for folding butter into dough). Let’s get baking!
Table of Contents
Croissants
What Makes Croissants So Special?
Croissants are not just any bread; they’re a labor of love. What makes them stand out?
- The Layers: When done right, a croissant has dozens of delicate, buttery layers that puff up beautifully in the oven.
- The Texture: A perfect croissant is crispy on the outside, soft and airy on the inside.
- The Flavor: Thanks to the high-quality butter and slow fermentation, croissants have a rich, slightly tangy taste that melts in your mouth.
And let’s be honest—there’s something incredibly satisfying about tearing into a fresh, warm croissant!
The History and Origins of Croissants
Would you believe that croissants didn’t actually originate in France? 🤯
The story goes back to 17th-century Austria, where bakers made a crescent-shaped pastry called the kipferl to celebrate a victory over the Ottoman Empire. Later, the recipe made its way to France, where bakers refined it into the buttery, flaky pastry we know today.
Now, croissants are a staple in French bakeries and beyond, loved all over the world.
Essential Ingredients for Perfect Croissants
Before we start making croissants, let’s talk ingredients. The quality of each ingredient makes a huge difference!
| Ingredient | Purpose | Quantity |
|---|---|---|
| All-Purpose or Bread Flour | Gives structure to the dough | 500g (4 cups) |
| Unsalted Butter (High-Quality) | Creates flaky layers and rich flavor | 280g (1 ¼ cups) |
| Whole Milk | Adds moisture and richness | 250ml (1 cup) |
| Sugar | Slight sweetness and helps fermentation | 50g (¼ cup) |
| Salt | Balances flavors | 10g (2 tsp) |
| Instant or Active Dry Yeast | Helps dough rise | 7g (2 ¼ tsp) |
| Egg (for egg wash) | Adds shine and color to croissants | 1 |
👉 Pro Tip: Use European-style butter (like Plugrá or Kerrygold) if you can—it has a higher fat content, which makes croissants extra flaky!
Step-by-Step Guide to Making Croissants from Scratch
Step 1: Preparing the Dough

Alright, time to get our hands doughy! The first step is making the base dough, also called “détrempe” in French.
1️⃣ Activate the Yeast
If you’re using active dry yeast, you’ll need to activate it first:
- Warm up the milk until it’s lukewarm (around 100°F or 38°C)—not too hot, or it’ll kill the yeast!
- Stir in the sugar and yeast and let it sit for 5-10 minutes until it gets frothy.
If you’re using instant yeast, you can skip this step and mix it directly with the flour.
2️⃣ Mix the Dough
Now, in a large mixing bowl:
- Combine the flour, salt, and sugar.
- Add in the activated yeast mixture (or just warm milk if using instant yeast).
- Mix everything until a rough dough forms.
At this point, the dough will look messy—that’s totally normal! The magic happens during kneading.
3️⃣ Knead Until Smooth
Kneading helps develop gluten, which gives croissants their structure. You can:
- Knead by hand for 8-10 minutes, or
- Use a stand mixer with a dough hook for 5-6 minutes.
The dough should become smooth, elastic, and slightly sticky. If it’s too dry, add a tablespoon of milk; if too wet, add a sprinkle of flour.
4️⃣ First Rest (Bulk Fermentation)
Place the dough in a lightly greased bowl, cover it with plastic wrap, and let it rise for 1.5 to 2 hours at room temperature (or until it doubles in size).
💡 Shortcut: If you don’t have time, you can let it rise overnight in the fridge—this actually improves the flavor!
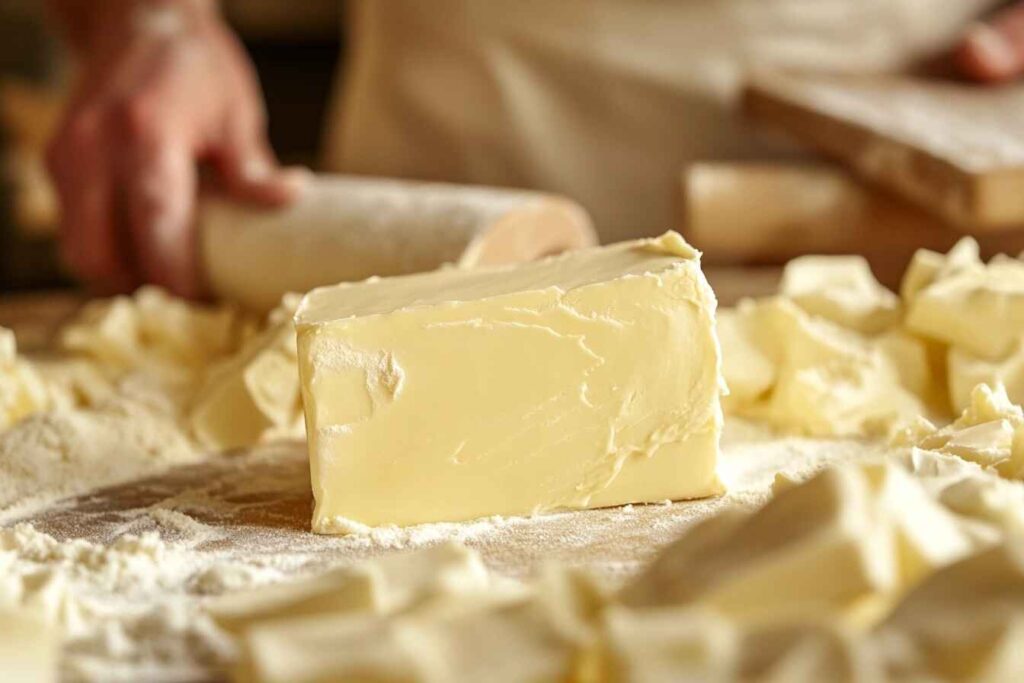
Step 2: Making the Butter Block (Beurrage)
This step is where the magic happens—lamination. The key to flaky croissants is cold, pliable butter.
1️⃣ Shape the Butter
- Place the butter between two sheets of parchment paper.
- Roll it into a 7×7 inch (18×18 cm) square.
- Chill it in the fridge until firm but flexible.
2️⃣ Chill the Dough
Once the dough has risen, punch it down and roll it into a 10×10 inch (25×25 cm) square. Cover and refrigerate for 30 minutes.
⏸️ Pause here! The dough and butter must be the same firmness before we start folding them together!
Step 3: Laminating the Dough – The Key to Flaky Layers
Lamination is what gives croissants their beautiful, airy layers. If you skip this step or rush it, you’ll end up with bread rolls instead of croissants (and nobody wants that!).
1️⃣ Enclosing the Butter Block
Now that we have our butter block and chilled dough ready, it’s time to combine them.
- Roll out the dough into a 10×10 inch (25×25 cm) square.
- Place the cold but flexible butter block in the center, diagonally (like a diamond).
- Fold the dough over the butter, sealing the edges like an envelope.
- Gently roll it out into a 14×7 inch (35×18 cm) rectangle.
💡 Pro Tip: If the butter starts melting, stop and refrigerate the dough for 10-15 minutes before continuing. The key to flaky layers is keeping everything cold!
2️⃣ First Fold (Single Turn)
This is where we start layering.
- Fold the dough like a letter—bring one-third of the dough over the center, then fold the other third over it.
- Rotate the dough 90 degrees, so the open edge is facing you.
- Wrap it in plastic wrap and chill for 30 minutes.
📝 What’s happening? Each time we fold, we’re creating more layers of butter and dough. More folds = more flakiness!
3️⃣ Second & Third Folds (More Layers!)
- Take the dough out and roll it into a 14×7 inch rectangle again.
- Repeat the same letter fold.
- Chill for 30 minutes, then do it one last time.
By now, we have created 27 layers of butter and dough! That’s what makes croissants so light and crispy when baked.
Step 4: Shaping and Proofing the Croissants
1️⃣ Rolling Out and Cutting the Dough
Now for the fun part—turning this dough into actual croissants!
- Roll out the dough into a 20×10 inch (50×25 cm) rectangle.
- Using a sharp knife or pizza cutter, cut triangles about 3 inches wide at the base.
- Stretch each triangle gently to elongate it.
2️⃣ Shaping the Croissants 🥐
- Start at the wide base of each triangle and roll it tightly toward the tip.
- Place them tip-side down on a baking sheet so they don’t unroll while baking.
- Space them at least 2 inches apart—they’ll grow!
💡 Pro Tip: For Pain au Chocolat, place a chocolate bar at the base of a rectangle instead of a triangle, then roll it up.
3️⃣ The Final Proof (Patience is Key!)
Croissants must proof slowly for the best texture.
- Cover them loosely with plastic wrap or a clean towel.
- Let them rise in a warm (75-80°F / 24-27°C) place for 2-3 hours, or until puffy and jiggly.
🚨 Don’t rush this! Underproofed croissants = dense and doughy instead of light and airy.
⏳ Pro Tip: To check if they’re ready, gently shake the tray. If the croissants wiggle like Jell-O, they’re perfect!
Step 5: Baking to Golden Perfection

1️⃣ The Egg Wash – That Beautiful Shine
Right before baking:
- Whisk 1 egg + 1 tbsp milk for an egg wash.
- Lightly brush it over the croissants.
👉 This gives them that bakery-style golden color!
2️⃣ Bake at the Right Temperature
- Preheat the oven to 400°F (200°C).
- Bake for 18-22 minutes, until deep golden brown.
🔥 The Secret: Start hot (400°F / 200°C for 10 minutes), then lower to 375°F / 190°C for the last 8-12 minutes.
📌 Why? The high heat makes the butter steam quickly, puffing up the layers. Then, lowering the temperature ensures they cook through without burning.
What’s Next? Enjoying Your Homemade Croissants!
Fresh vs. Next-Day Croissants
Fresh croissants are best right out of the oven. But if you want to store them:
- Room temp: 1-2 days in an airtight container
- Fridge: Up to a week (reheat at 350°F / 175°C for 5 minutes)
- Freezer: Up to 3 months (reheat from frozen at 375°F / 190°C for 10 minutes)
🥐 “Croissants are like dreams—you need to enjoy them before they disappear!”
Common Croissant Problems (And How to Fix Them!)
Even experienced bakers sometimes struggle with croissants. If yours didn’t turn out quite right, don’t worry! Here are some common issues and how to fix them.
1️⃣ Dough Didn’t Rise Properly
❌ Problem: The dough stays flat and doesn’t puff up.
✅ Solution:
- Check your yeast—expired yeast won’t work!
- Use warm milk (100°F/38°C) to activate yeast properly.
- Proof in a warm, draft-free place (75-80°F / 24-27°C is ideal).
2️⃣ Butter Leaking During Baking
❌ Problem: The butter melts out, leaving croissants dry.
✅ Solution:
- Make sure the butter and dough are the same firmness before laminating.
- Don’t overwork the dough—it should stay cold.
- Proof at the right temperature! If it’s too warm, the butter melts before baking.
3️⃣ Croissants Are Dense Instead of Flaky
❌ Problem: No airy layers, just a heavy texture.
✅ Solution:
- Underproofing is the #1 cause! Proof until the croissants jiggle slightly when shaken.
- Roll the dough gently—don’t press too hard, or you’ll crush the layers.
- Make sure to bake at high heat (400°F / 200°C at first) to help them puff up.
4️⃣ Not Enough Layers (More Like Bread Rolls)
❌ Problem: The dough is soft but lacks the signature flaky texture.
✅ Solution:
- Don’t skip or rush the three folds during lamination.
- If the dough gets too soft, chill it between each fold.
- Use good quality, high-fat butter—cheap butter has too much water!
“Croissants are a balance of science and art—small details make a BIG difference!”
Delicious Croissant Variations to Try!
Once you’ve mastered the classic croissant, why not get creative? Here are some fun variations you can try!
1️⃣ Chocolate Croissants (Pain au Chocolat) 🍫
Chocolate lovers, this one’s for you!
How to make it:
- Instead of cutting triangles, cut dough into rectangles.
- Place a small chocolate bar or chocolate chips at one end.
- Roll it up tightly, proof, and bake as usual.
🔥 Pro Tip: Use dark chocolate for a rich, authentic taste!
If you’re a fan of sweet, rich flavors, you’ll also love this Strawberry Crunch Cake!
2️⃣ Almond Croissants (French Bakery Style) 🌰
If you have day-old croissants, this is the best way to bring them back to life!
What you need:
- Almond Cream (Frangipane): Mix 1/2 cup almond flour, 1/4 cup sugar, 1 egg, 2 tbsp butter.
- Slice croissants in half, spread almond cream inside, then top with more cream and sliced almonds.
- Bake at 350°F (175°C) for 10-15 minutes until golden.
“Almond croissants are like the gourmet upgrade of a regular croissant!”
3️⃣ Savory Croissants (Ham & Cheese) 🧀
Perfect for breakfast or brunch!
How to make it:
- Before rolling, add ham and shredded cheese inside the dough.
- Roll as usual and bake.
- Serve warm for the ultimate cheesy pull-apart experience.
🔥 Pro Tip: Brush the tops with garlic butter for an extra savory touch!
Best Croissant Pairings & Serving Ideas
Now that you’ve made amazing croissants, let’s talk about the best ways to enjoy them!
1️⃣ Best Drinks to Enjoy with Croissants ☕
| Drink | Why It Pairs Well |
|---|---|
| Coffee ☕ | The bitterness balances the buttery richness. |
| Hot Chocolate 🍫 | Sweet and creamy, just like a Parisian café. |
| Tea 🍵 | Earl Grey or Green Tea add a delicate contrast. |
| Orange Juice 🍊 | A fresh, citrusy contrast to the croissant’s buttery taste. |
“A croissant without coffee is like Paris without the Eiffel Tower!”
2️⃣ Croissant-Based Breakfast & Brunch Ideas
Looking for more ways to serve croissants? Try these!
- Croissant Sandwich 🥪 – Fill with scrambled eggs, bacon, and cheese.
- French Toast Croissant 🍯 – Dip in egg, fry, and top with maple syrup.
- Berry & Cream Croissant 🍓 – Stuff with whipped cream and fresh berries.
Frequently Asked Questions About Croissants
H3: 1️⃣ Can You Make Croissants Without Butter?
Nope! Butter is what gives croissants their flaky layers. If you want a dairy-free version, try using vegan butter with a high fat content.
H3: 2️⃣ How Long Does It Take to Make Croissants?
From start to finish, about 12-14 hours (including chilling and proofing). If you proof overnight, it makes the process easier!
H3: 3️⃣ Can You Freeze Croissant Dough?
Yes! After shaping the croissants, freeze them unbaked. When ready to bake:
- Thaw overnight in the fridge.
- Proof at room temp for 2-3 hours before baking.
“Homemade croissants are a labor of love, but every bite is worth it!”
Conclusion: Mastering the Art of Croissant Making
Congratulations! You’ve just learned how to make bakery-style croissants from scratch. From mixing the dough to laminating, shaping, and baking, you now have all the secrets to perfect, buttery, flaky croissants.
Here’s a quick recap:
✅ Use high-quality butter for the best layers.
✅ Keep everything cold to prevent butter from leaking.
✅ Be patient—good croissants take time!
So, are you ready to impress your friends and family with homemade croissants? Go ahead, bake a batch, and enjoy the magic of fresh, buttery layers melting in your mouth! 🥐✨
“Good things take time, and croissants are proof of that!”
Final Thoughts & Next Steps
- 📸 Tag your croissants on social media! Let me know how they turned out.
- 🔥 Try new variations—chocolate, almond, or even matcha croissants!
- 🥐 Keep practicing—each time, your technique will improve.
Now, go enjoy your homemade croissants! Happy baking! 🎉👩🍳👨🍳